


The same ingredients mixed in a different order give a different compound. The reason is physical: filler is wetted by polymer first and by oil second, and curatives must meet the rubber last.
Conventional (right-side-up)
Load the polymer first, soften it, then add fillers and oils in portions, then small chemicals.
- Pro: gentle on the machine, good wetting of the first filler portion.
- Con: slower with high filler loadings, and powders can dust and be lost.
- Fit: stiff polymers that need breakdown first (HNBR, FKM), recipes with moderate filler levels.
Upside-down
Load fillers and chemicals first, add polymer on top, and drive the ram down.
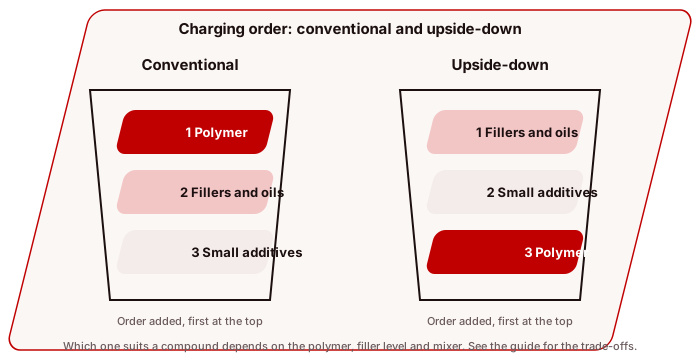 Figure. Order of addition in conventional and upside-down mixing.
- Pro: fast incorporation, lower dust loss and good for very high filler levels.
- Con: higher power peak, risk of poor wetting if polymer is slow to form a band.
- Fit: general rubber compounds with high filler loading and soft polymers. Rarely used for stiff fluoroelastomer gum.
Masterbatching
Mix the polymer with everything except the curatives, dump, cool, then add curatives in a second pass. Masterbatching protects against scorch and allows an intense first stage.
- A dispersion masterbatch of a difficult ingredient such as zinc oxide in polymer can be made separately and added later for fast, even incorporation.
- Remilling is a repeat pass of the masterbatch without adding anything, to lower viscosity and improve dispersion.
Y-mixing and slush mixing
- Y-mixing: two separate premixes, combined in a final mix. Useful for polymer blends where each polymer needs its own filler.
- Slush mixing: premix oil with filler before it goes into the mixer. Useful for oil-extended or high-oil compounds.
When to add oil and plasticiser
Too early and the oil lubricates the rubber so that filler slides off without dispersing. Too late and the oil is not absorbed. The common practice is to add oil after the filler has been wetted and partly dispersed.
Curatives last
Peroxide, sulfur, accelerators and coagents are added at the lowest practical temperature. For very scorch-sensitive recipes, add them on a cooled two-roll mill or in a cooled mixer.
Sources and further reading
- Ciullo and Hewitt, The Rubber Formulary (1999), masterbatching, remilling and finish mixing.